- v1.0.0-latest-prod
This document provides a comprehensive overview of the Content Browse View within a Content Management System. It serves as a guide for content editors, detailing the interface and functionalities for efficient content browsing, searching, and management. Key features include a navigable folder structure, content creation and placement options, advanced search capabilities, and various content filters.
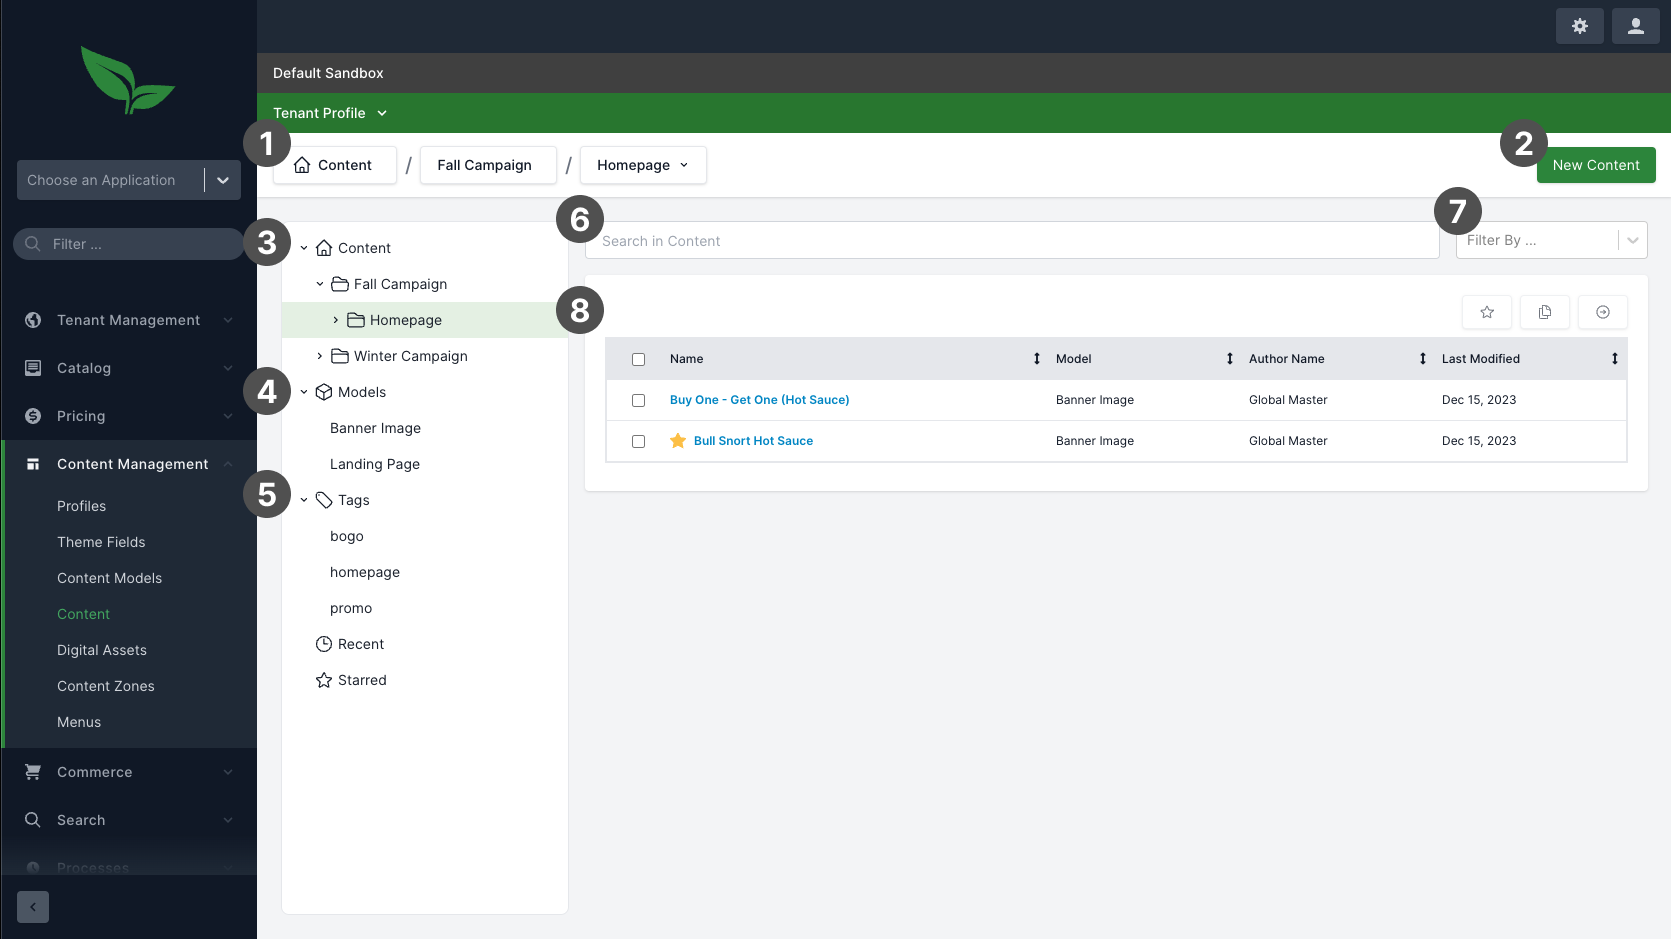
The content browse view is where content editors can browse and search for content. The image below shows the view with numbered callouts. Each number is described in more detail below.

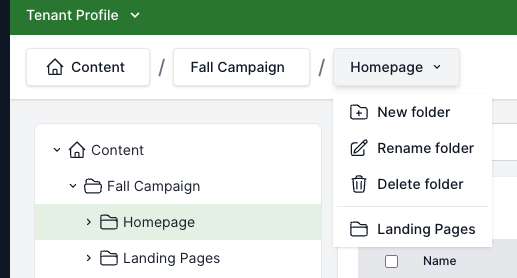
(1) This section shows the user’s current location in the folder structure. The individual levels can be clicked to change the location to the selected folder. Selecting the "Homepage" button reveals a dropdown (see below) allowing the user to create a new folder, rename the existing one, delete it, or navigate to the current folder’s neighboring folders:
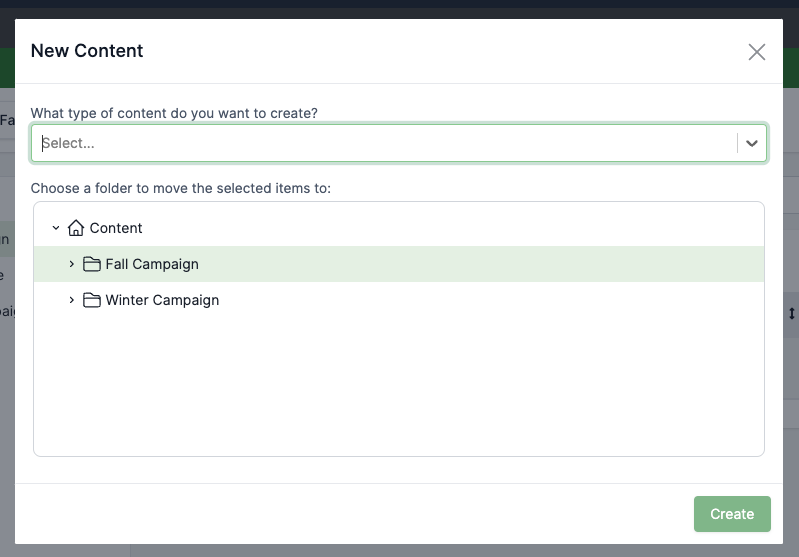
(2) Clicking the "Add Content" button reveals a modal, allowing the user to choose what type of content they want to create, as well as choose what folder to place it in.
(3) The entire folder tree structure with "Content" being the root. Any folders containing sub-folders can be expanded. Selecting a folder will update the title bar to the new location and show content items contained within the grid to the right.
(4) An alternate way to find content items using the various content models as filters. Selecting a content model will show all items of that type in the grid to the right.
(5) The remainder of the left navigation allows users to find content items based on tags, find items that were recently modified, and any items that have been starred by the user.
The tags, when expanded, show all the user defined tags and allow for quick filtering.
Recent items include any content that has been recently modified by anyone in the system.
Starred items allow the user to mark items that they will be working on periodically for easy access. You can see that the "Bull Snort Hot Sauce" item has been starred in the grid.
(6) The search bar allows for a richer search experience in addition to searching by name. The user can search by various details of the content. A couple simple examples:
tag:banner - This would return all items with a tag of "banner".
model:"Landing Page" - This filters for a specific model name.
author:Jon - Find all content with an author of "Jon".
etc.
These search terms can be combined to zero in on exactly what the user is looking for.
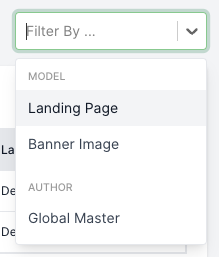
(7) This "Filter" dropdown contains the various content model names and authors that are used within the current view, allowing the user to filter down the results.
(8) This is the results grid, it shows all the content items within the current context (folder, search results, specific model type, etc.)
Selecting the checkbox of one or more items reveals the "bulk action" buttons to the top right of the grid. In order from left to right, these are:
Mark as starred
Move items to another folder
Clone selected items
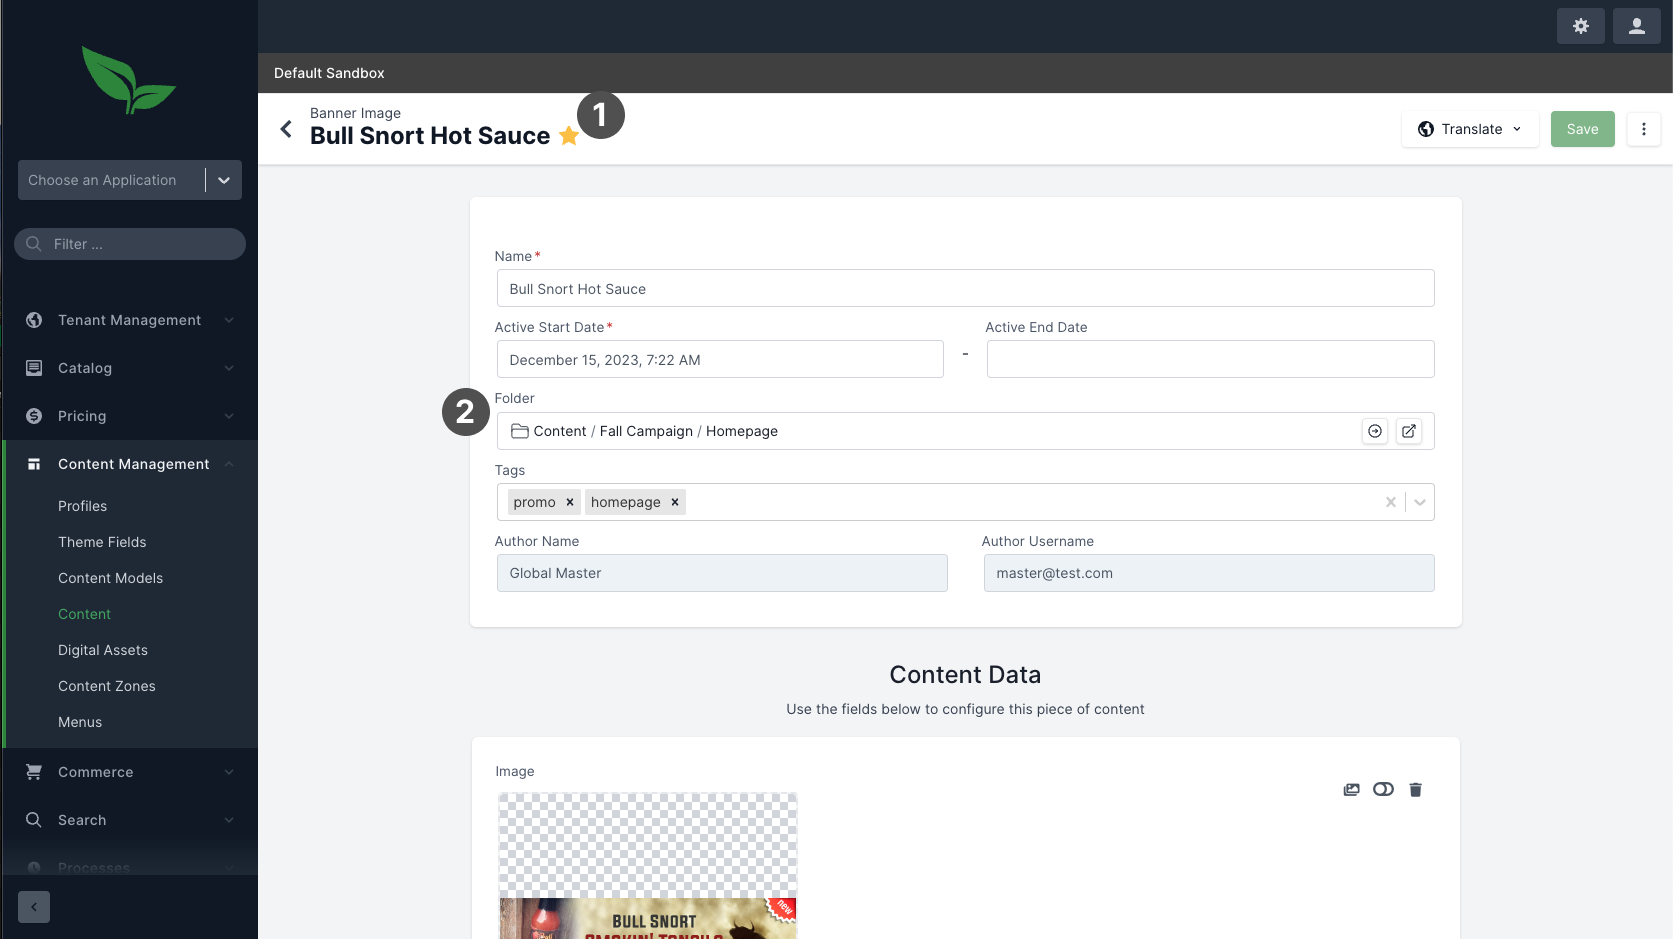
(1) Added to the title bar, next to the content’s name is a new icon to show if the item has been "starred" by the current user. Marking an item as "starred" allows the user to find the content at a later date more easily by using the "Starred" section of the Content Detail View.
(2) This field shows the contents' current folder and allows the user to perform a couple actions:
Move the item to a different folder. From the Modal that opens, the user is able to select a different folder or create a new folder, similar to the process when creating a new content item.
Return to the Content Browse View opened directly to the folder that this content is currently in. In this case, the user would be navigated to the "Content / Fall Campaign / Homepage" folder.