- v1.0.0-latest-prod
This tutorial will show you how to make a very simple catalog search API request to your provisioned demo instance of Broadleaf Microservices.
|
Tip
|
If you haven’t already, we recommend reading our introductory OpenAPI UI article before going through this. |
|
Tip
|
While we believe the OpenAPI UI is the best way to experience the Broadleaf Microservices API, if you want to follow this tutorial using the popular Postman utility, please see our Postman Reference article before proceeding. |
Using the OpenAPI UI, learn how to make a request to the Search microservice to search for a product.
|
Note
|
There are actually two catalog search endpoints.
One is in the Catalog Browse microservice at This tutorial will show you how to make a request to the endpoint in the Search service, serving as an example of making a request to a secured endpoint. |
Navigate to the catalog search operation in the interactive OpenAPI UI.
Visit the OpenAPI UI (https://[your-demo-identifier].admin.blcdemo.com/api/docs).
Find "Search Service" in the left navigation menu.
Scroll down to the "Catalog Search" tag.
Find the GET /catalog-search operation.
This is the operation we will be making requests to.

Authenticate and authorize for the request.
Following the steps explained in the OpenAPI UI tutorial, authorize and request the PRODUCT scope, which is required for this operation.
Make a request to find the "Sudden Death Sauce" product.
Click the "Try it out" button near the top of the operation to enable drafting the request.
Specify request parameters.
The operation exposes quite a few parameters, but they’re largely optional. To keep things simple, we’ll just be customizing three parameters and leaving the rest as-is:
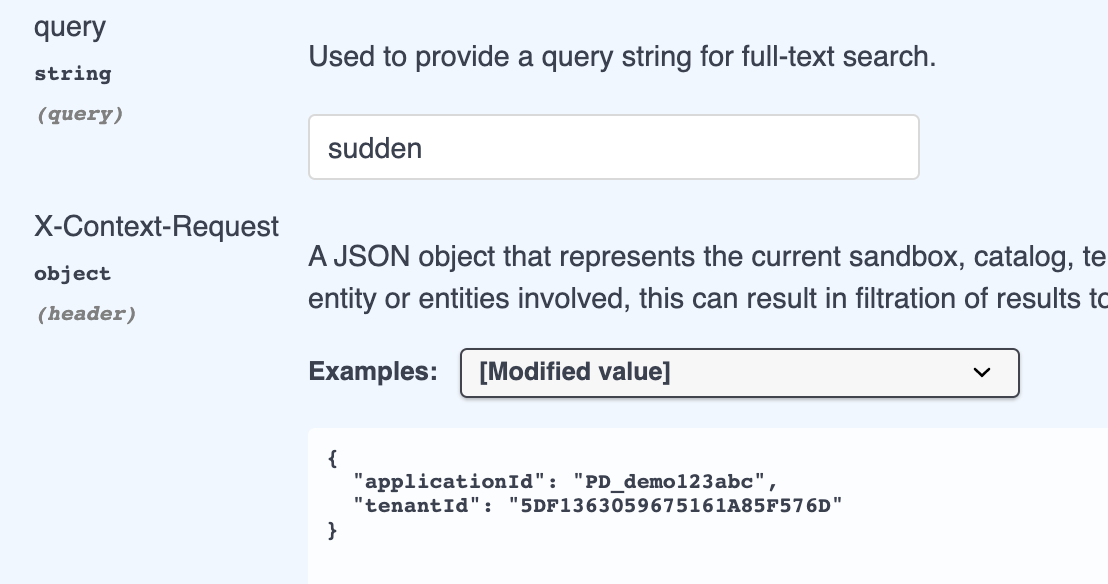
query - as documented, this is the text we want to submit as our search query.
Specify "sudden" for this value, as we want to find the "Sudden Death Sauce" product.
X-Context-Request
X-Context-Request is a header containing crucial context information the server will use to "narrow" results.
By default, the value for this is loaded from the "Application Context" example.
We can’t just directly use this value, though, as we need to make sure it matches the context of your specific provisioned demo instance.
Change the applicationId property in the value to PD_[your-demo-identifier], where [your-demo-identifier] the unique identifier of your demo (ex: demo123abc).
This is the applicationId of the application that was created when you provisioned your demo.
You can leave tenantId as-is, since your application will have been provisioned within that default tenant.
searchRequest - as documented, this is where the query and filter details used to narrow the search results are held.
Clear this field, removing the filters as we don’t want to restrict our results.
The UI should now look something like this:

Click the "Execute" button to submit the request.
|
Tip
|
Before submitting the request, open your browser’s developer tools to the "Network" tab.
This will allow you to see the exact request that is made, which can be helpful in understanding how all of the headers (such as X-Context-Request and Authorization) and query string parameters were supplied.
Some browsers even support "Copy as cURL" on requests, producing cURL commands that can be executed through a CLI or imported into software like Postman.
|
Examine the response.
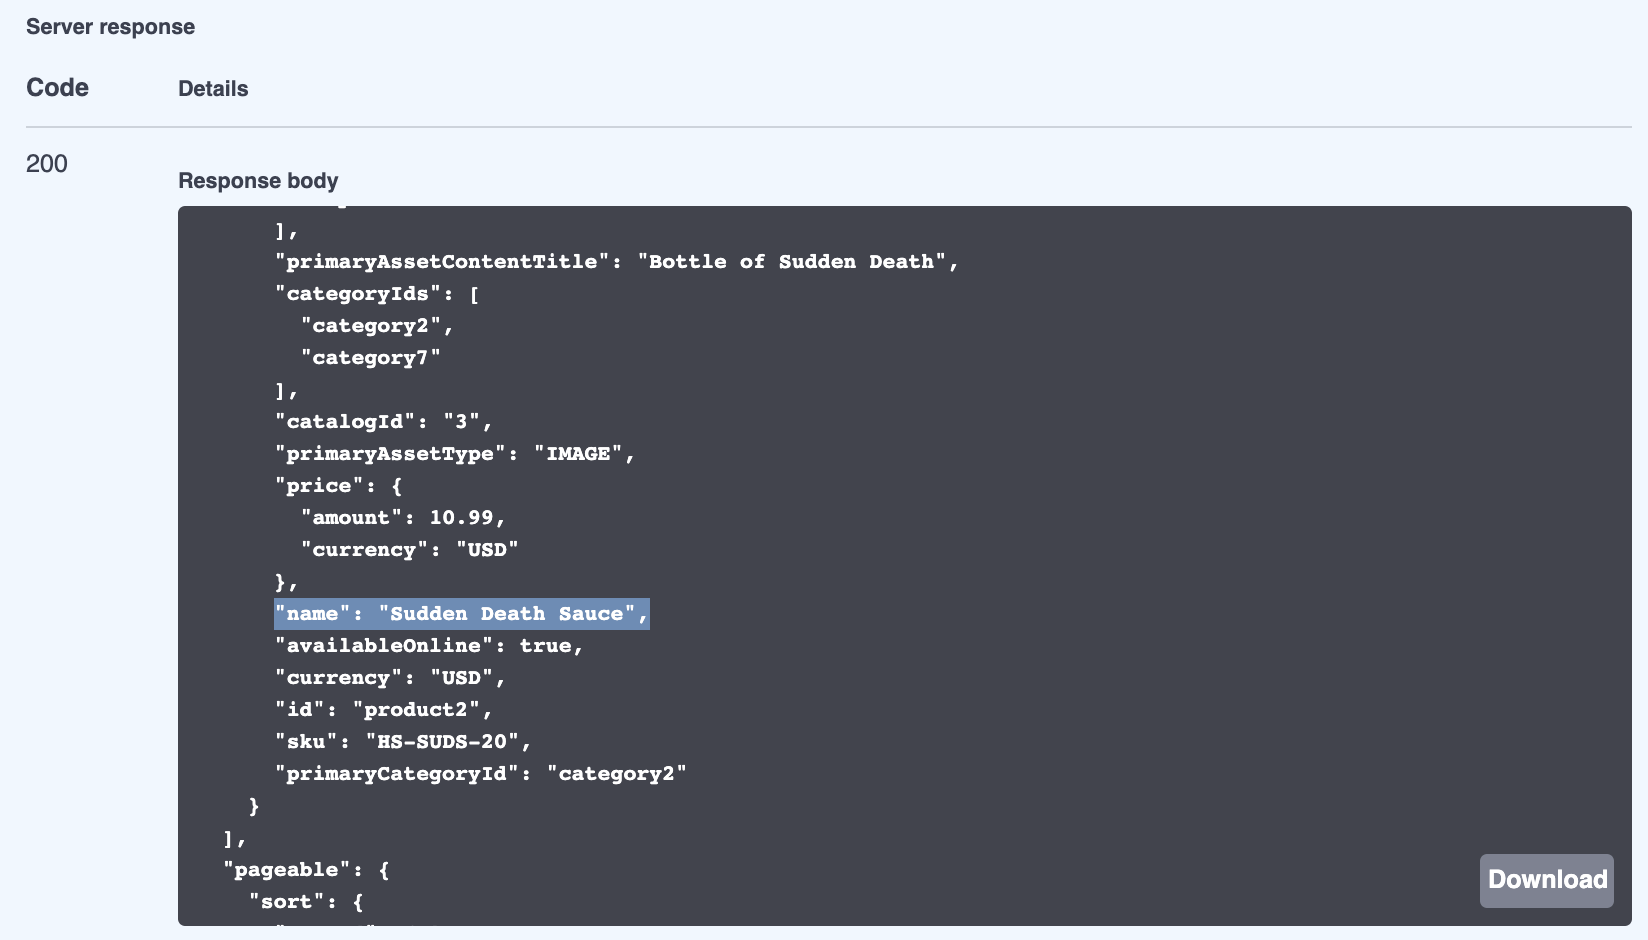
If you scroll down a little, the "Server Response" will be shown.
It should be a 200 with just the "Sudden Death Sauce" product in the results.
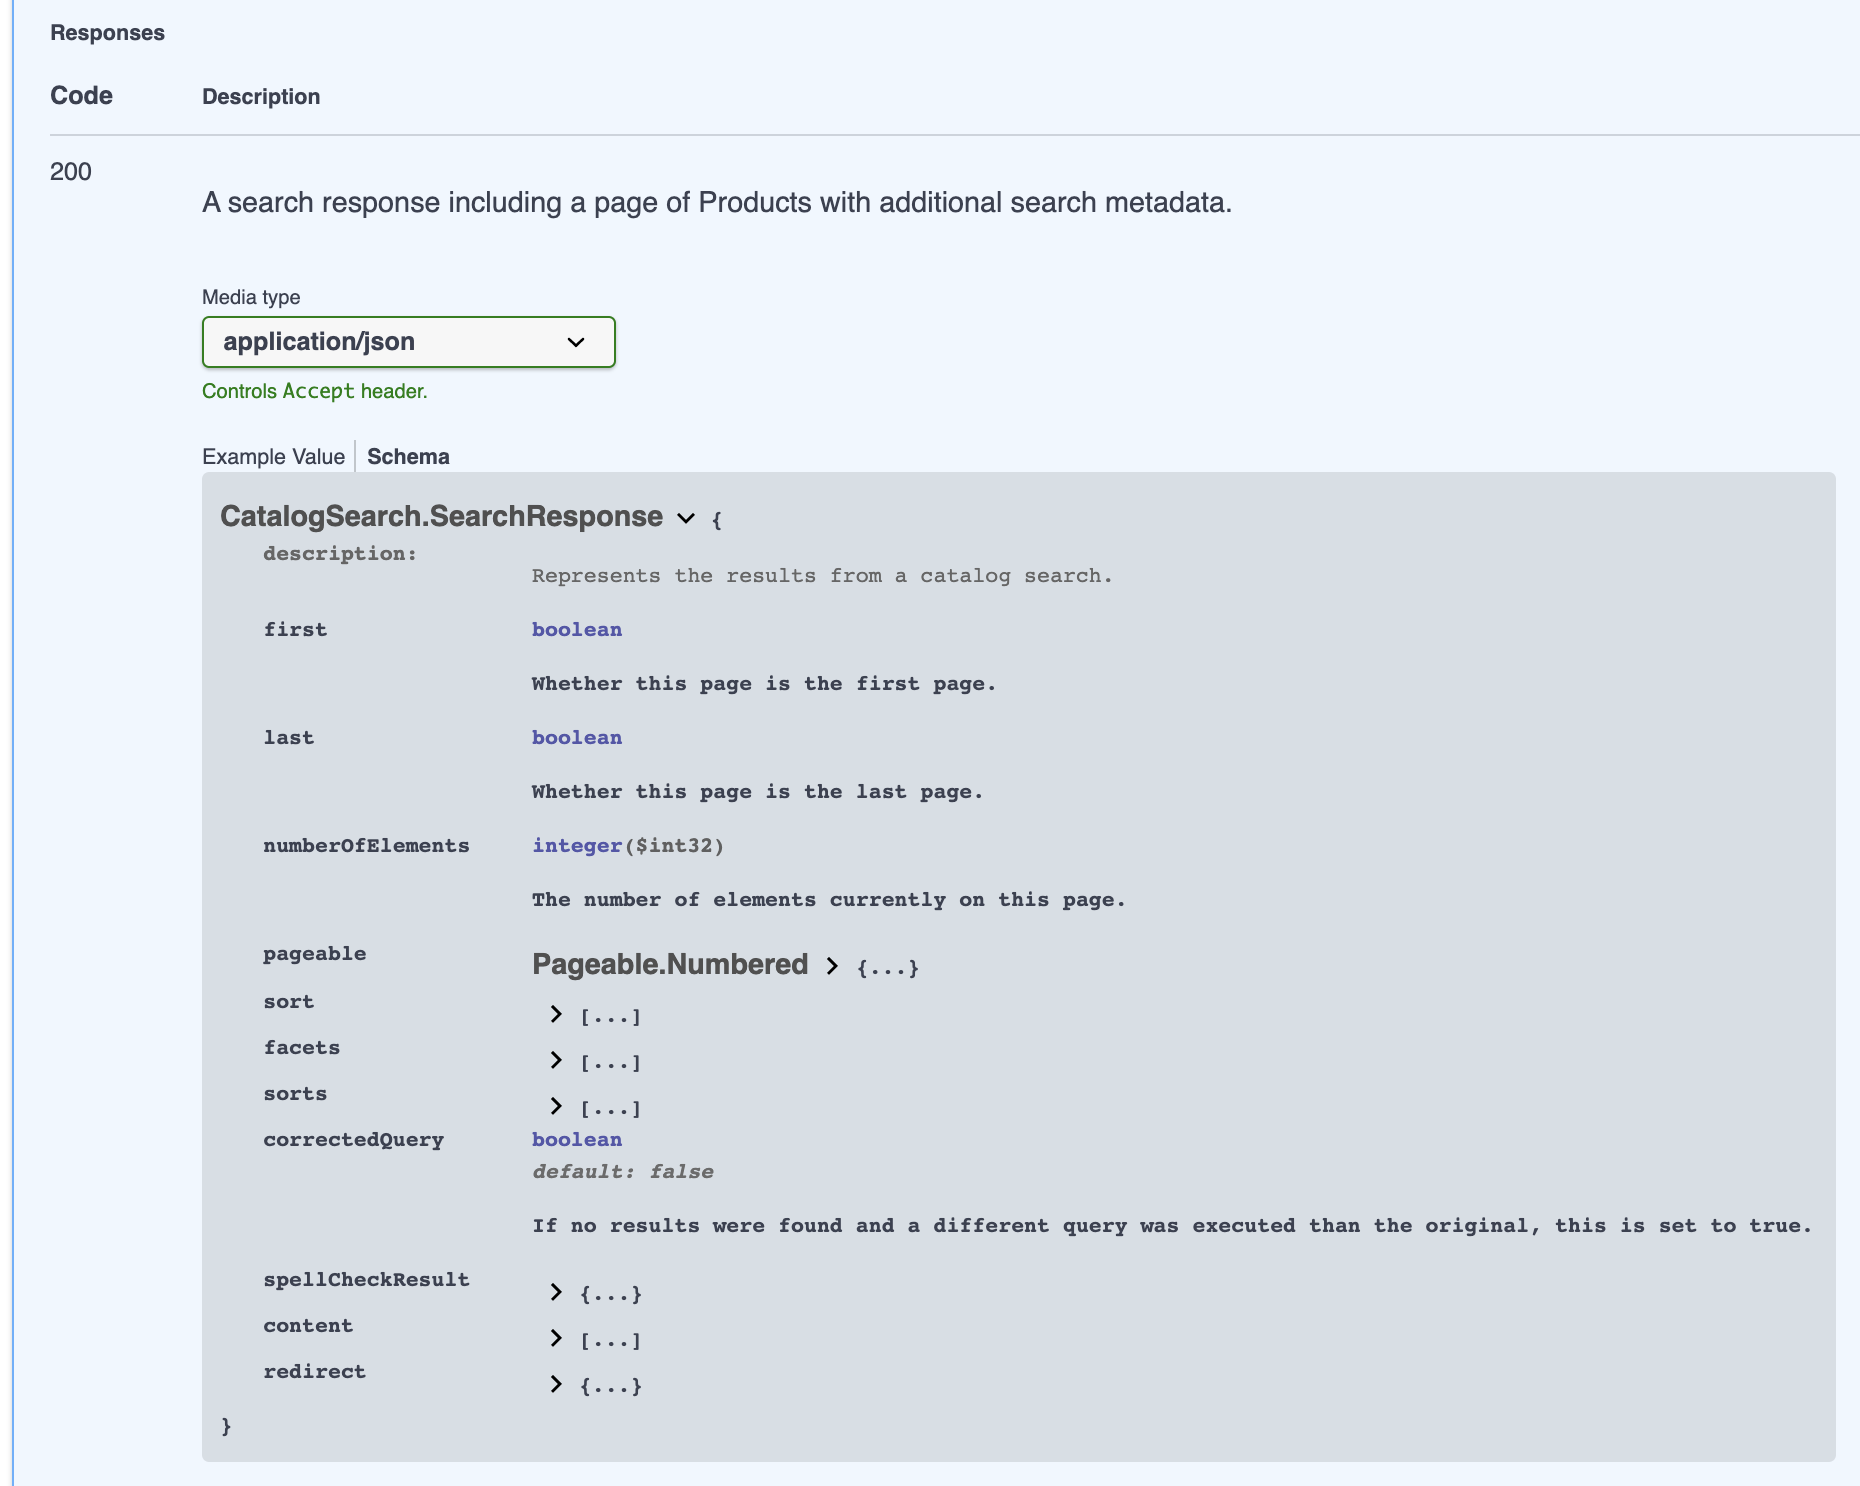
If you click on "Schema" next to "Example Value", you’ll be treated to a view that clearly shows each of the fields to expect, along with their description, type, and defaults.
|
Note
|
Wondering where the product data came from? Your demo instance will have some simple seed data already populated at the time it is provisioned. The "Sudden Death Sauce" is a product that the seed data contains. |

Sure, you’ve got the response now, but what does any of that JSON even mean?
You’ll need to see the response schema next to the 200 entry in the "Responses" section, as shown in the OpenAPI UI article.

This clearly shows you each of the fields to expect, along with their description, type, and defaults.
For example, if you look at the content field, you’ll see that we expect it to contain the list of product objects matching the search criteria.
Nice!
This concludes the tutorial. Try playing around with different parameters and see what you can get!